Understanding Dodge and Burn in Photoshop
What is the Importance of Dodge and Burn in Photoshop
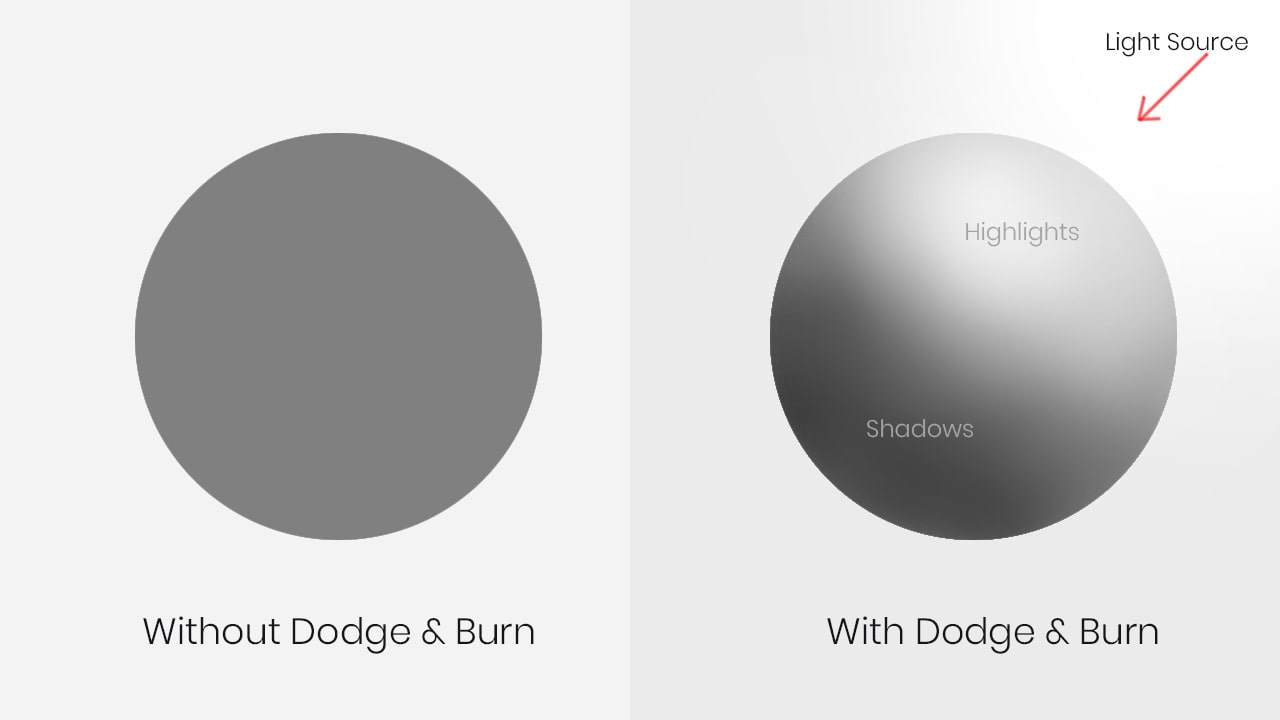
In Photoshop, there exist so many tools for dodge and burn. Dodge and burn is nothing but creating highlight and shadow in a photo, whether it is a portrait, Landscape, poster, manipulation. It gives the feel of depth, and 3d look of any picture, as shown in fig 1.1 There are so many procedures for dodging and burning in photoshop than any software. You can use the dodge and burn tool, Photoshop adjustment layers, and Photoshop Blending Modes.
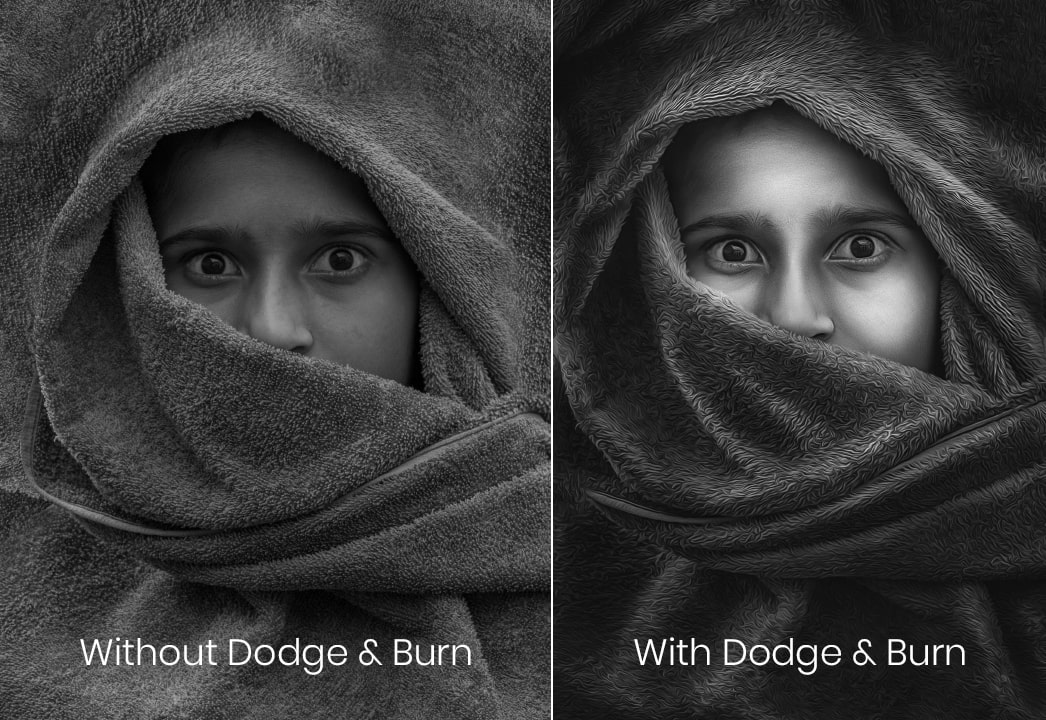
You can apply dodge and burn to Colored photo or black & white photo, as shown in fig 1.2 So the essential thing is to understand the Light first. How light works, and it behaves. So there are three main crucial things in Light.
a. The intensity of Light means how much the quantity of Light is coming from the source of Light
b. The direction of light means from which angle light is falling on the subject
c. Quality of Light means how much Light is soft and hard. whenever you have hard Light means the hard effect of shadow and soft Light means the mild impact of shadow and highlight
Dodge and Burn Using Blending Mode Grey Color in Photoshop
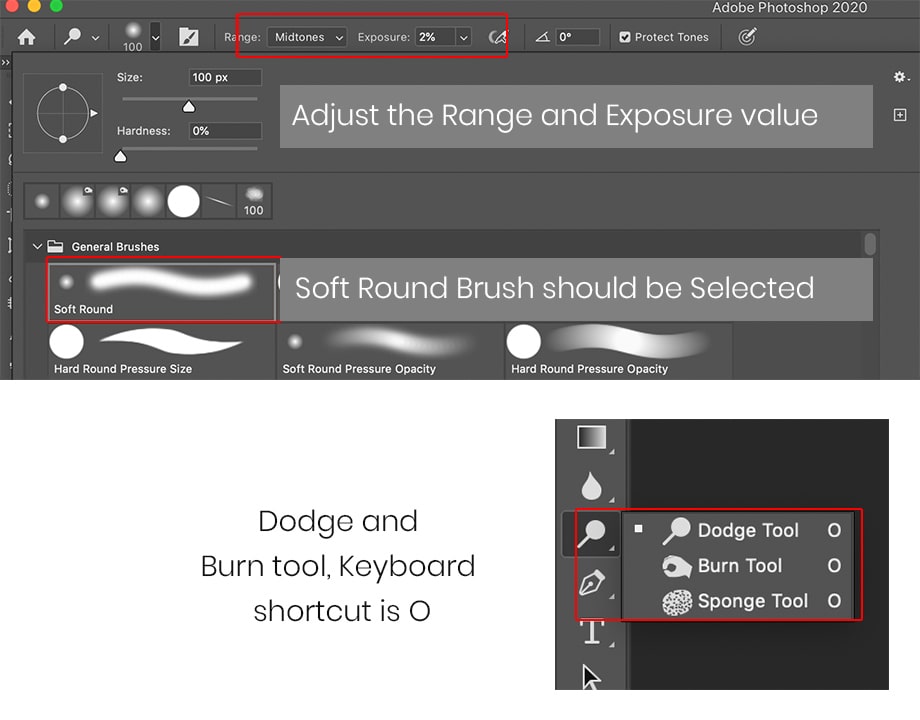
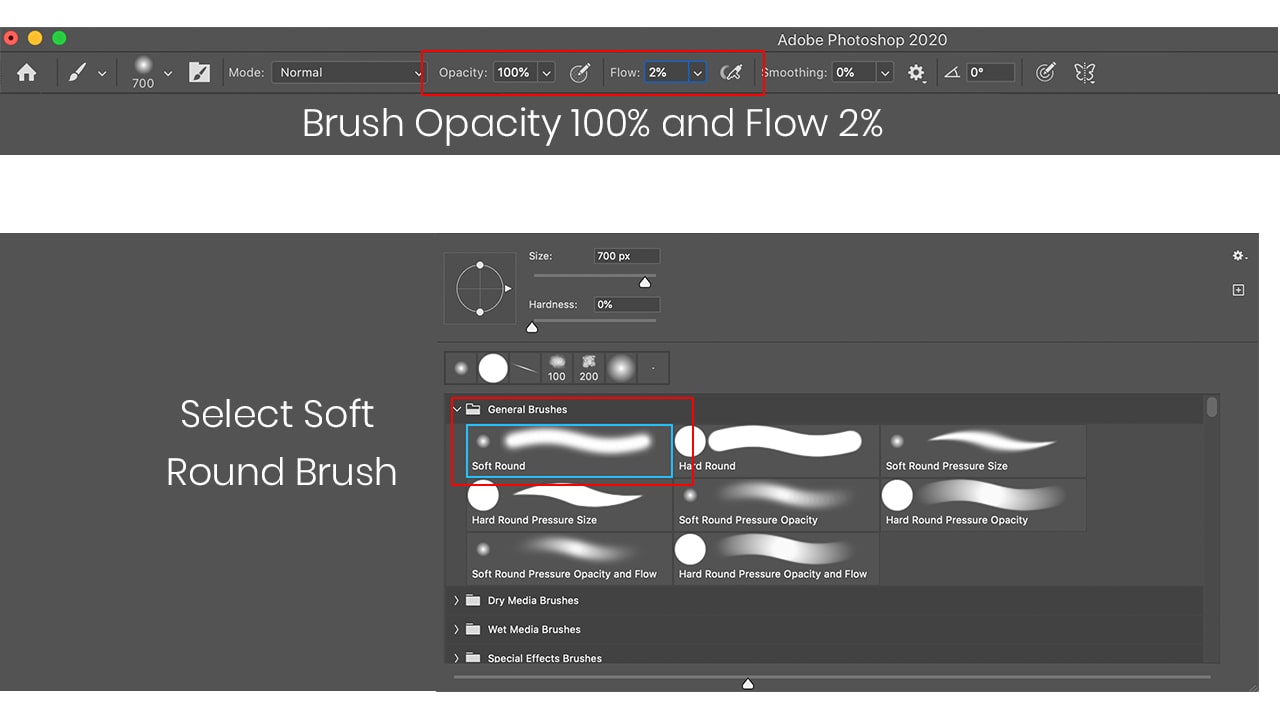
Here the critical thing to understand is the brush how the brush works for photoshop dodging and burning. So always use a soft round brush to create a smooth and realistic result 1.3 Here the primary significance is the exposure value of brush and range value that you want to be affected.
Exposure controls the overall effect of the dodge and burn tool. A high value of exposure means more effective than low value indicates a moderate result of the brush. In most of the cases, I use exposure value from 0 to 20. set the range value to midtones in most of the time.
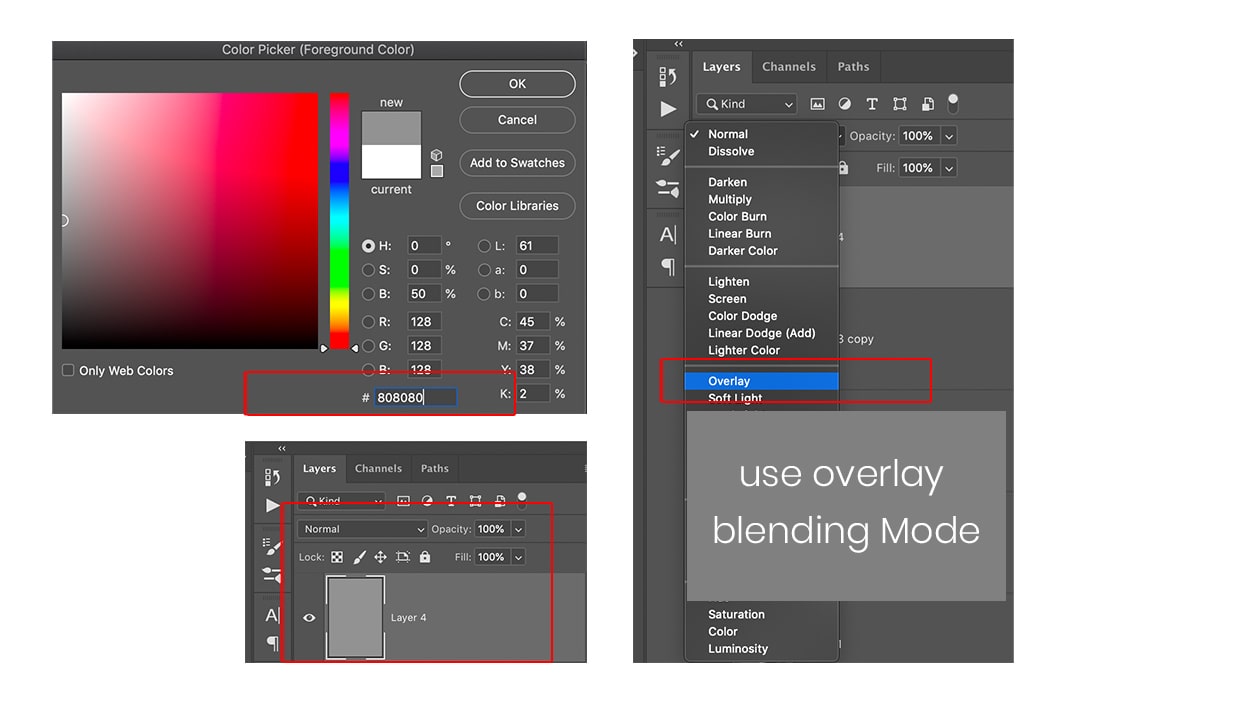
After understanding the direction and intensity, we keep in mind then create a new layer by pressing ctrl+n upon the layer that you wish to do dodge and burn in photoshop. Now fill this empty layer with a 50% grey color or use the color code 808080, as shown in Fig 1.4 set its blending mode to overlay. Check this article on blending modes of how Photoshop blending mode works. After setting the blending mode to overlay, the grey color will disappear. Now select the dodge tool. Apply the dodge tool according to the direction of Light. Create the effect of highlight and shadow as per your need.
After completing your process, you can adjust the opacity of the layer. .just set the blending mode to normal. You can see what the result of the dodge burn layer is smoother or harder. A hotchpotch means the direction of the brush is wrong, or the brush size is not appropriate. So checking the layer time on time is very important. You can create two separate layers for dodge and burn just for your convenience.
Dodge and Burn using Photoshop Adjustment Layers
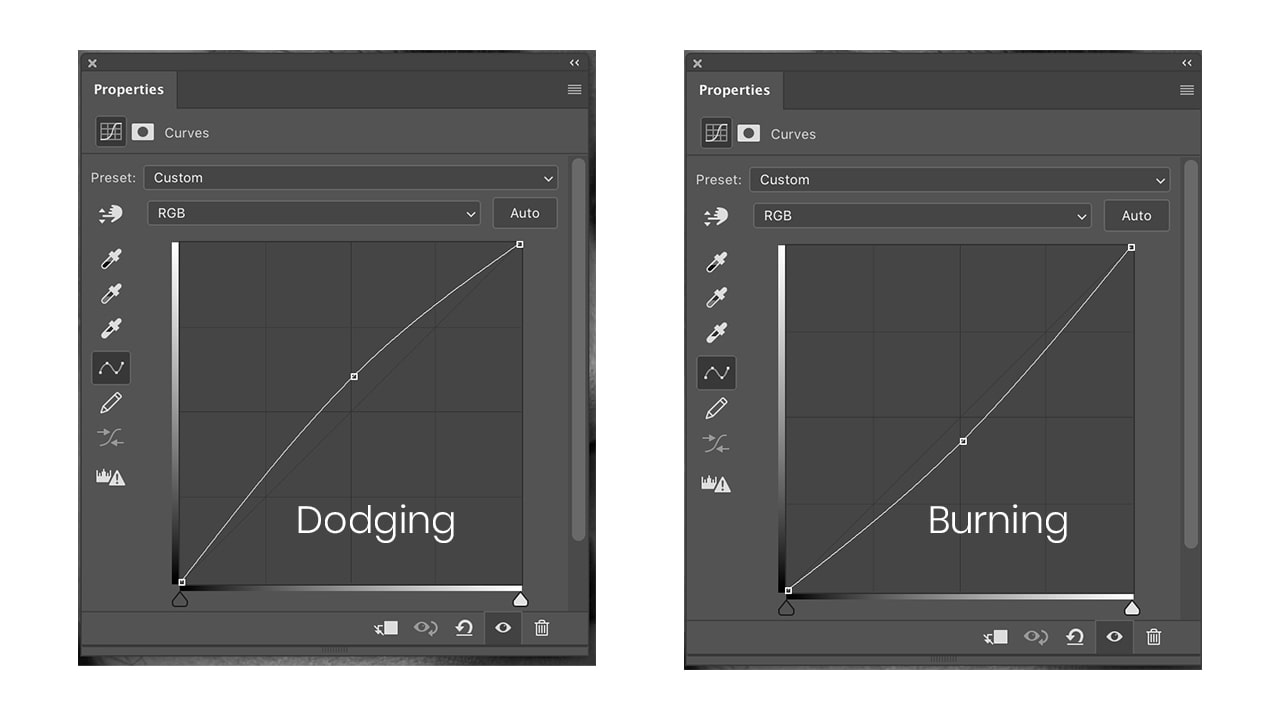
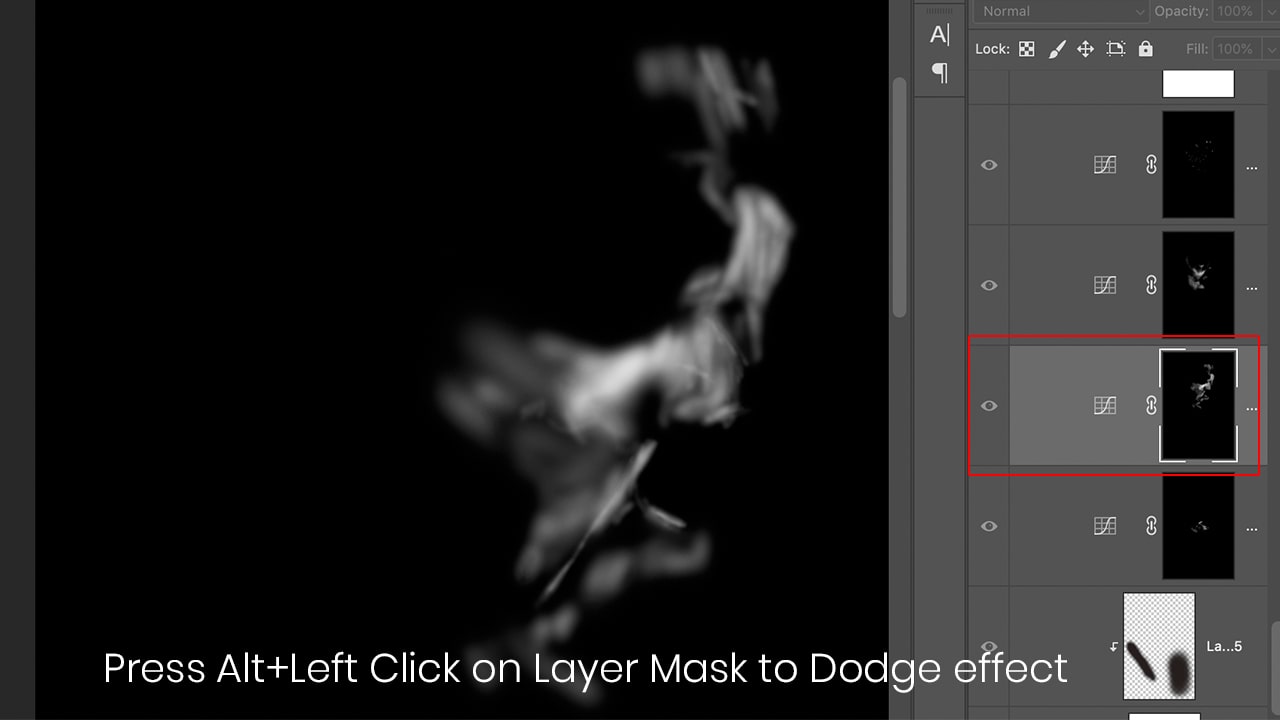
Dodge and burn using Photoshop adjustment layers. Create two curves adjustment layers. Move the diagonal line in the first curve adjustment layer to the upper side for dodging and drag the diagonal to down for the burn effect on the 2nd curve adjustment layer, as shown in Fig 1.5
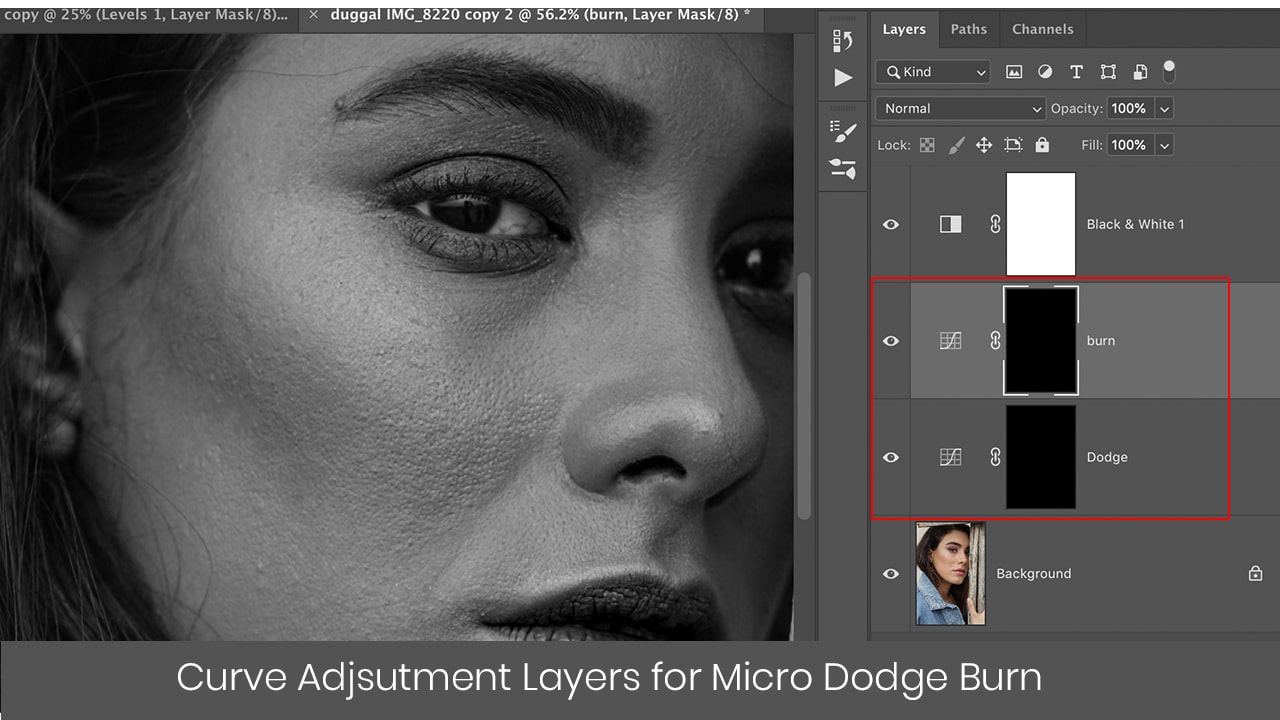
Convert the white mask to black by pressing ctrl+i, as shown in fig 1.6
Now take a soft round white color brush. Opacity should be 100 percent, and flow should be 2 percent, as shown in fig 1.7 Apply the brush to create a dodge and burn effect on the black mask. This way of dodging and burning process is a very time-consuming process, and much practice is required to get a smooth and effective result.
To check what is happening on the mask. Just press Alt +left click on the layer mask, as shown in fig 1.5. now photo will turn into a black layer where you can see the strokes of the brush applied. Read article on Micro Dodge and Burn
One of the most important things is that the type of hardware tool is to be used. Mouse and Wacom tablet creates different result and feel. You have developed much practice to use mouse for dodging and burning. a Wacom tablet helps you to control the direction of the brush in resulting more smoother and perfect. So it recommended using the Wacom tablet.
Dodge and Burn Using White brush and Softlight Blending Modes
The next way of doing dodge and burn is by taking a new layer on the top of the layer. Set its blending mode to softlight or overlay. Now use the soft round white brush and apply on the empty layer. adjust the opacity and flow for smooth and effective result
