Perfect Eyebrow Shaping in Photoshop
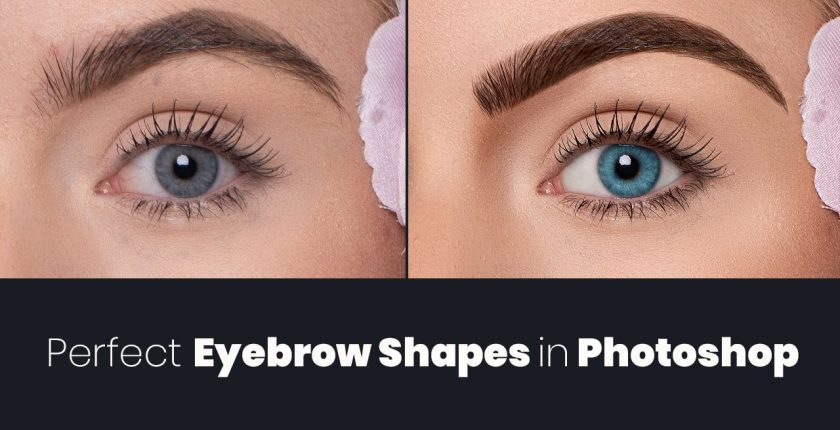
So in this photoshop tutorial, you will learn to get better shaping of the eyebrow using photoshop layers, masking, Stamp tool, Micro dodge, and burn, Brush tool with particular hair setting.
Process of Shaping Eyebrow
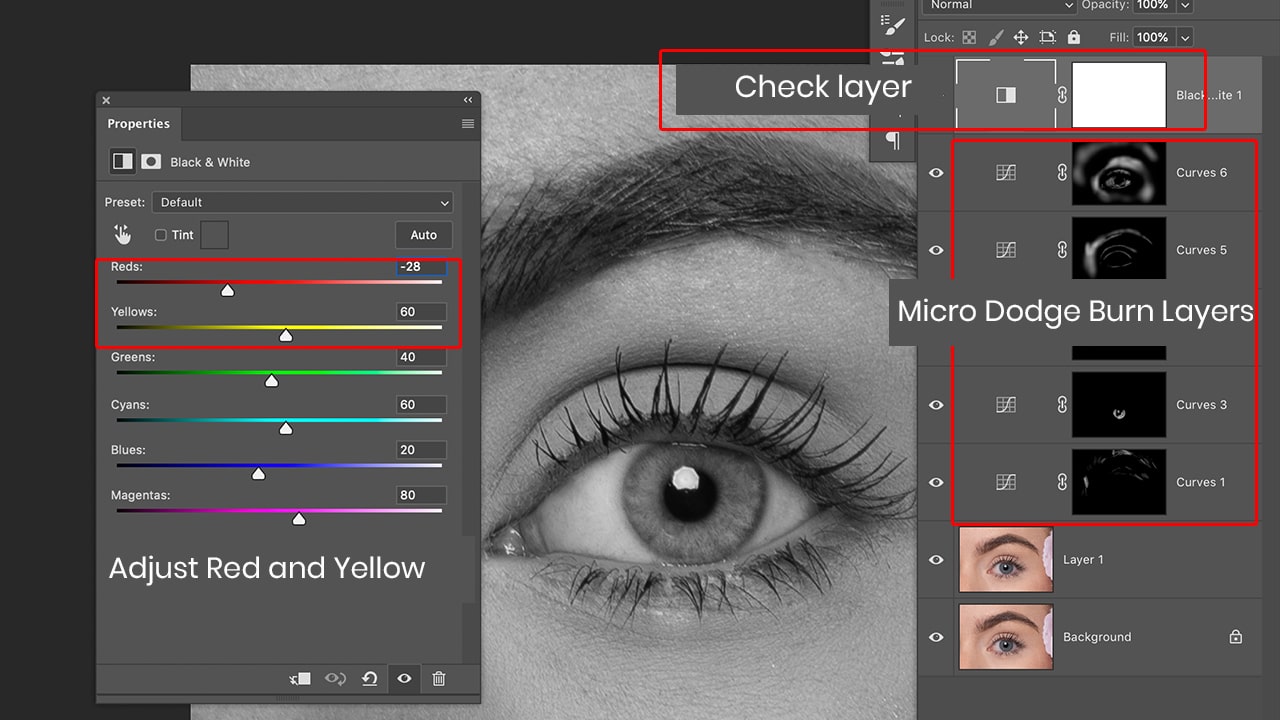
Open an Eye photo in photoshop. Take a new duplicate by pressing ctrl+j Now create a new check layer by black and white adjustment layers. Place this photoshop check layer on the top of all layers just to make visible imperfections. Adjust the value of red and yellow to clear the blemishes on the skin, as shown in fig 1.1, create a new curve adjustment layer for Micro dodge and burn ( read micro dodge and burn article ) after setting the micro dodge and burn layer. Just make sure soft round white brush and apply a curve layer mask to create smooth and perfect skin around eye and eyebrows, follow fig 1.1.
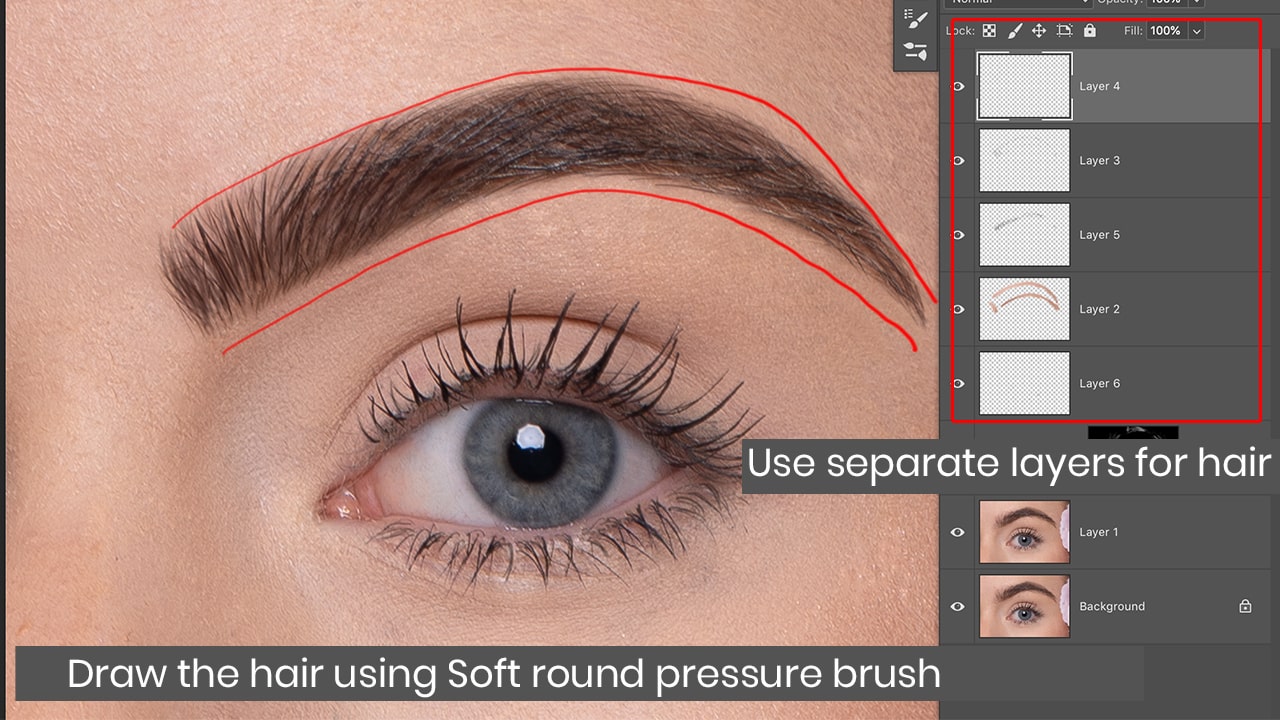
After completing the process of smooth skin around eyebrows and look the fig 1.2, Now you need to understand the theory of shaping eyebrow. There is a right diagonal line starting from the edge of the nose is showing the length of the eyebrow from left to right. Where the line is meeting to eyebrow ending that should be the length of the eyebrow, now take a look at the straight 90-degree angle line that should be the starting point of the eyebrow. There is one more diagonal center line starting from the edge of the nose and crossing the eye pupil to the eyebrow. That is showing where should the peak of the eyebrow. After understanding the concept of lines around the nose and eye. make a picture in your mind to create the shape of an eyebrow.
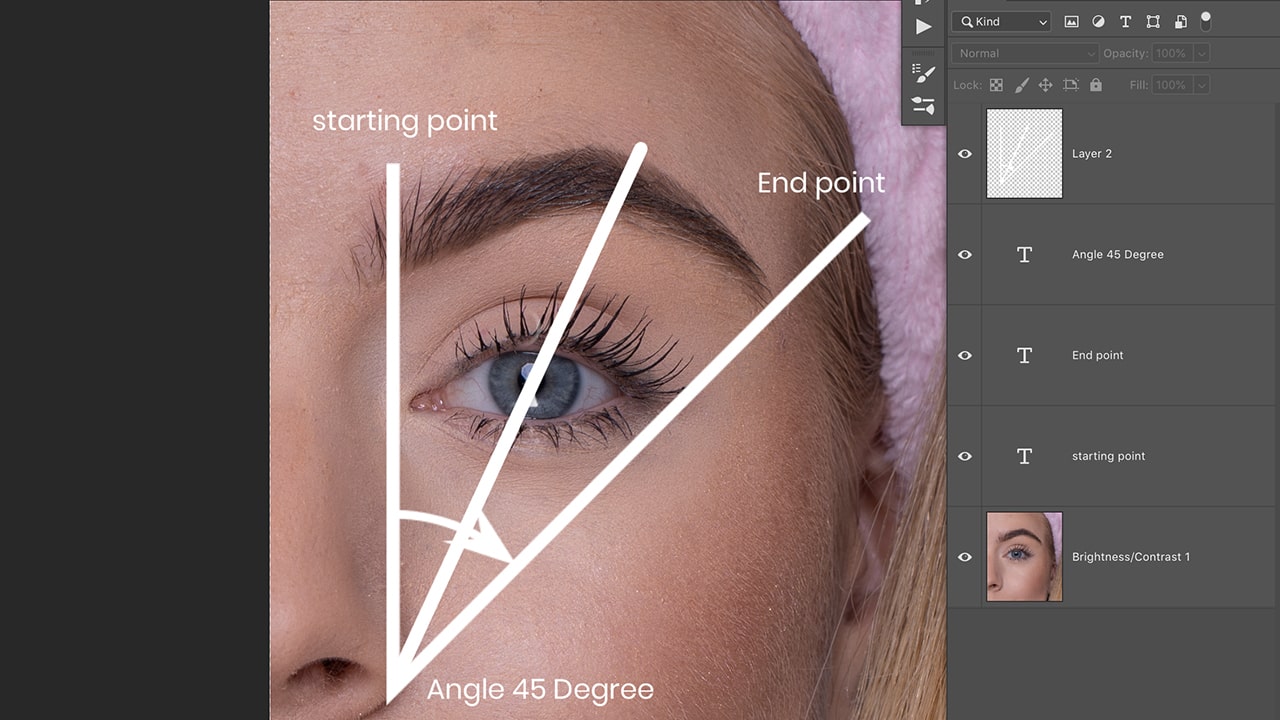
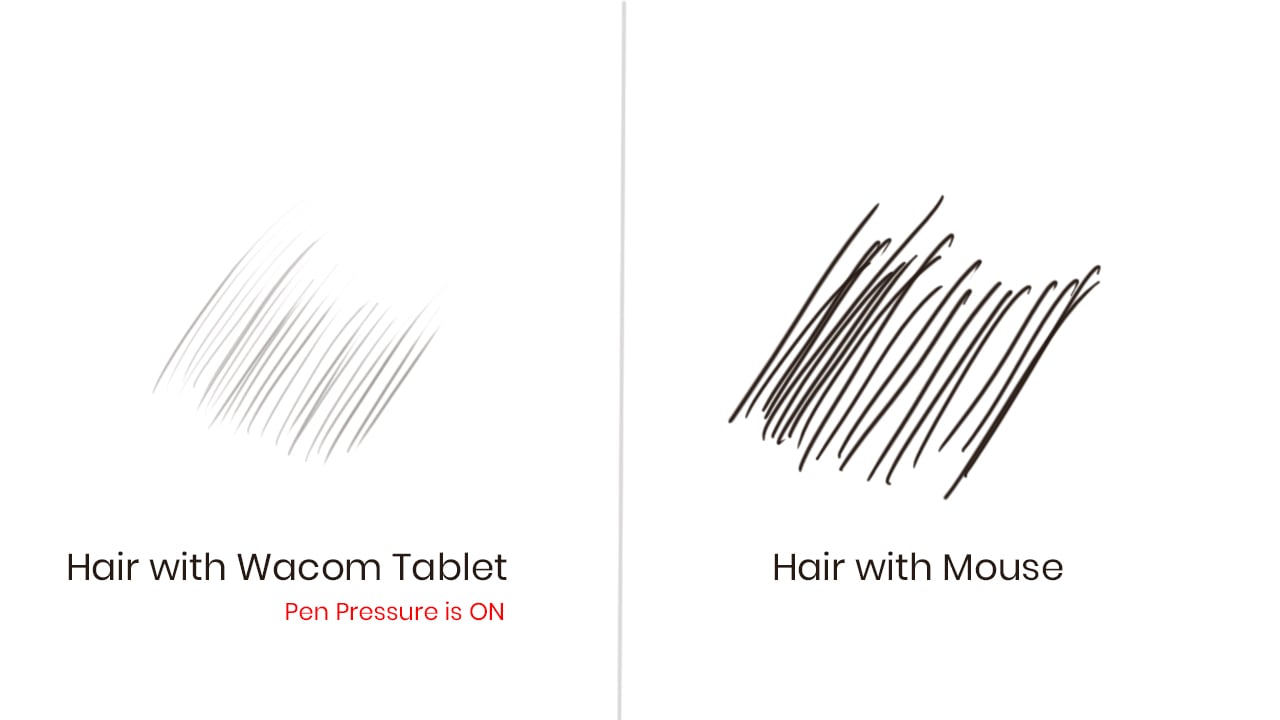
Choose the stamp tool and select all layers in the options bar of the stamp tool. Take a new layer upon the curve adjustment layer. Use the stamp tool around the eyebrow, where is coming out of the line Do it very gently with a Wacom tablet or mouse. I recommend using Wacom tablet all the time in Photoshop CC. just because it helps to draw the linear brush direction, not in a zigzag way. make sure the starting and ending point of the eyebrow should not cross the suggested parameter as shown in fig 1.2
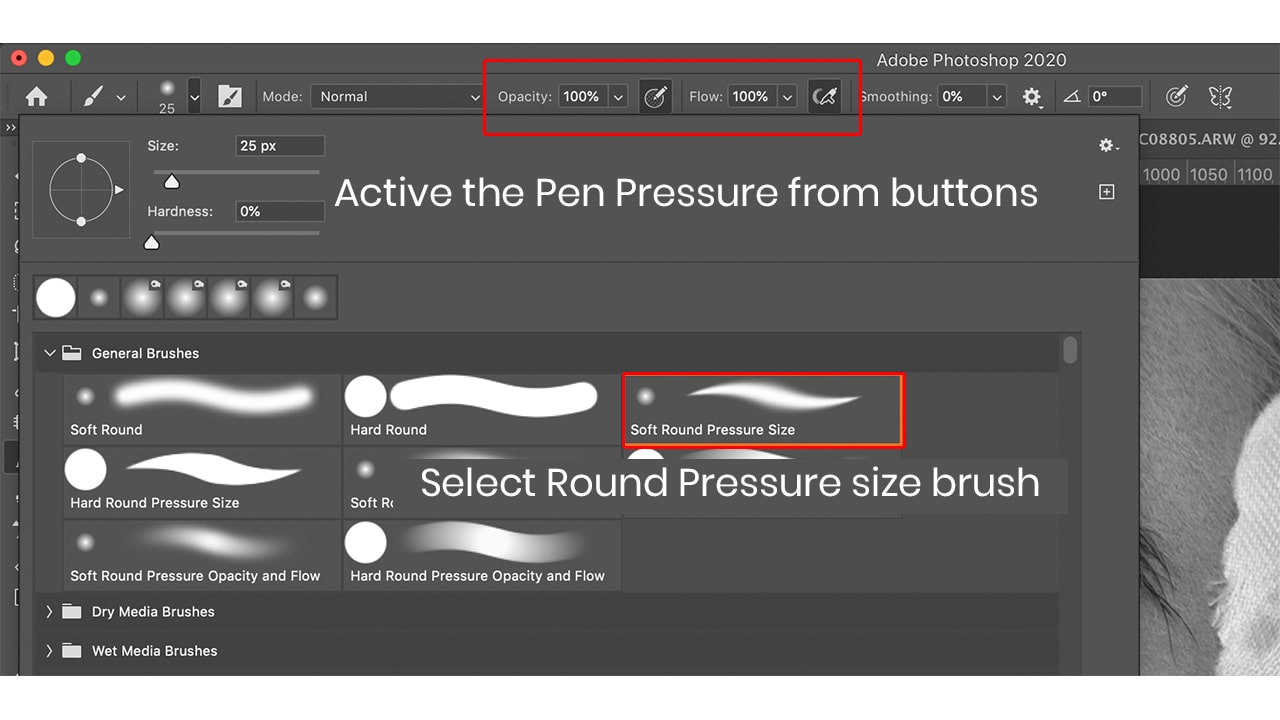
Select the simple soft round pressure size button, as shown in fig 1.3. Now a critical thing about brush pressure is controlled by the hand.
A soft hand on the Wacom tablet creates a mild effect of brush, and the hard impact of hand on Wacom creates a more visible and clear line as shown in fig 1.3 make the hair on eyebrows and around it see fig 1.5 You can create another layer to make your workflow of hair on two separate layers.
You can do the same process on another eyebrow. After completing the process, retouch the eyes.
After completion of the retouching part of the eye and eyebrow, you should apply Photoshop micro dodge and burn on the whole face to retouch skin.
Few recommendations about skin retouching. The above method should be used in high-end fashion and beauty retouching photos and try to avoid high-end skin retouching on mobile pictures, point shoot camera photos, and low-resolution photos. These high-end techniques require high-resolution base photos. Always try to make sure to select a Raw file photo instead of JPEG photos to get better result of your editing process.
Moreover, Wacom Tablet is a must for doing any skin retouching workflow. It controls the gesture of the hand and results in a perfect stroke of the brush on Photoshop canvas, so avoid the use of the mouse for skin retouching.
